Posts by Dan

    During my time in Cuba I was impressed with the ingenuity of the Cuban spearfishermen, finding solutions for diving and spearfishing gear that we take for granted. Some equipment is better made than others, and some is so raw it makes me question whether I'd dive in those conditions. Just goes to show you how tough Cuban spearos are. I'll add to this thread as I come across more examples of the home made gear.


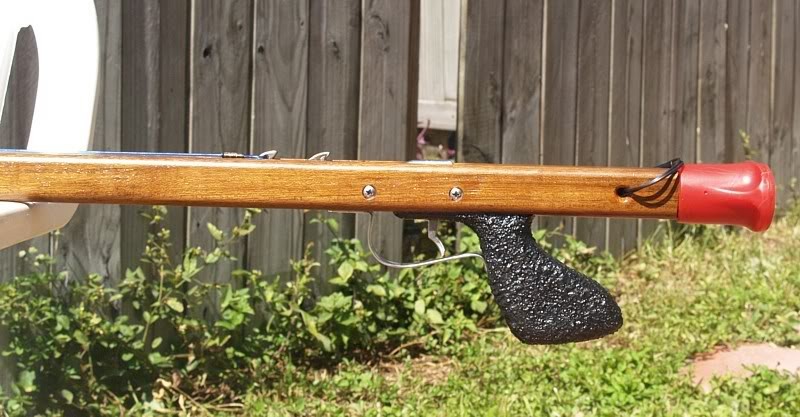
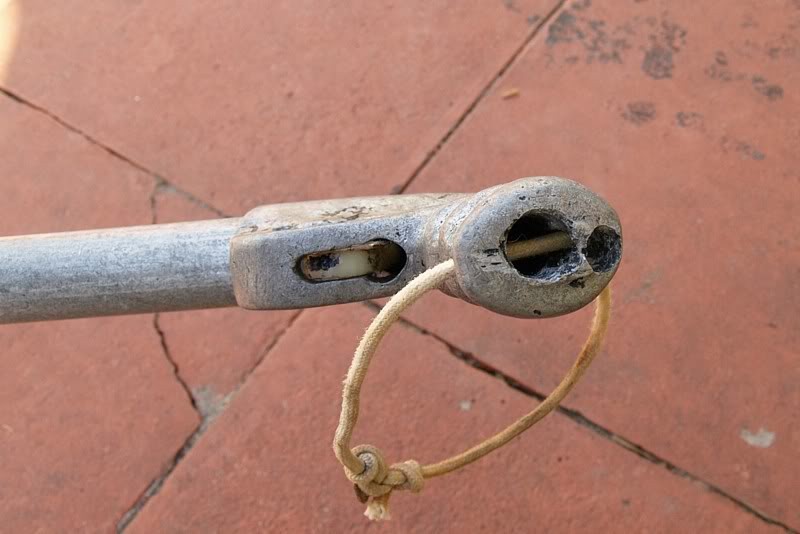
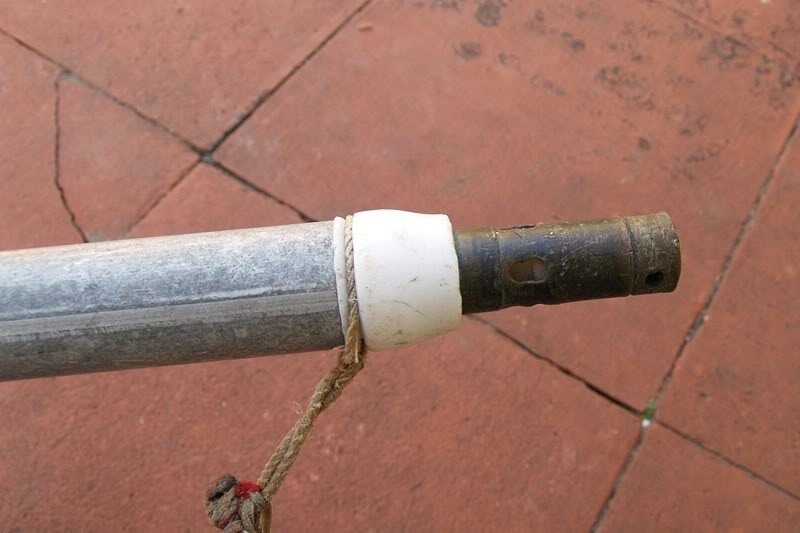
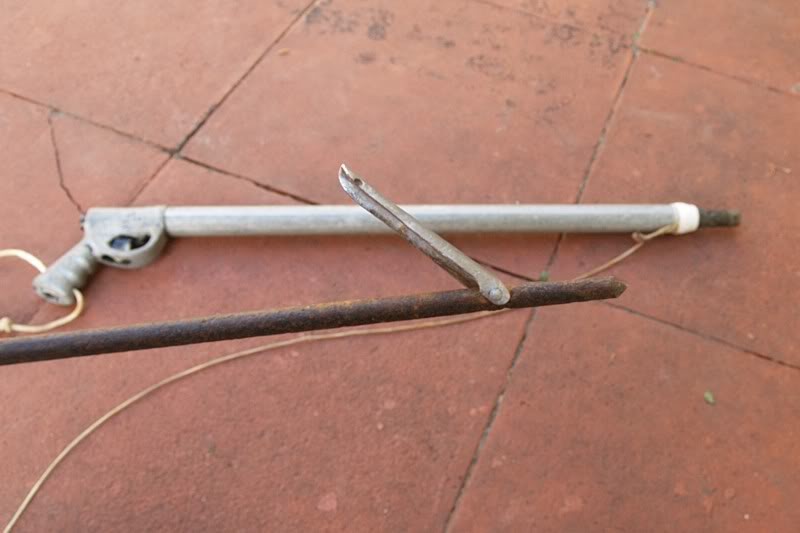
    Here's a typical home made pneumatic speargun from Cuba, although many times they can also be seen with a plastic handle of very old Mares production with all the other parts being home made or criollo as they say in Cuba. It's nostalgic for me to see this gun. Of course it's far from ideal as spearguns go. It's 80cm long with the shaft being 92cm and looks like less than 7mm in diameter. I don't know what it's made of, I don't think it's aluminum because it's fairly heavy, 4.5lb as opposed to my Cyrano 70cm which is 2.5lb. Looks maybe like galvanized steel. The handle looks like it was poured in a mold, it's very thick and looks to be the same material as the barrel. The muzzle looks like brass and probably so is the inner barrel. The shaft is obviously rusted so it's not stainless.


    I was asked by a friend if this is the gun length all spearfishers use in Cuba. The answer is they try to get the best possible and if this is all that's available then they'll use it and very efficiently. What they lack in fine gear they make up in determination, endurance and diving ability. Usually cuban divers will try to have the longest pneumatic that they can load comfortably. I've never seen a band gun used by a Cuban in Cuba. When asked why they answer that there are no parts for a band gun. By this I take it to mean that there are is no rubber tubing to make bands out of. Other than that Cubans are strongly conditioned to use pneumatics and continue using them when they come to the US even if other options are available to them.


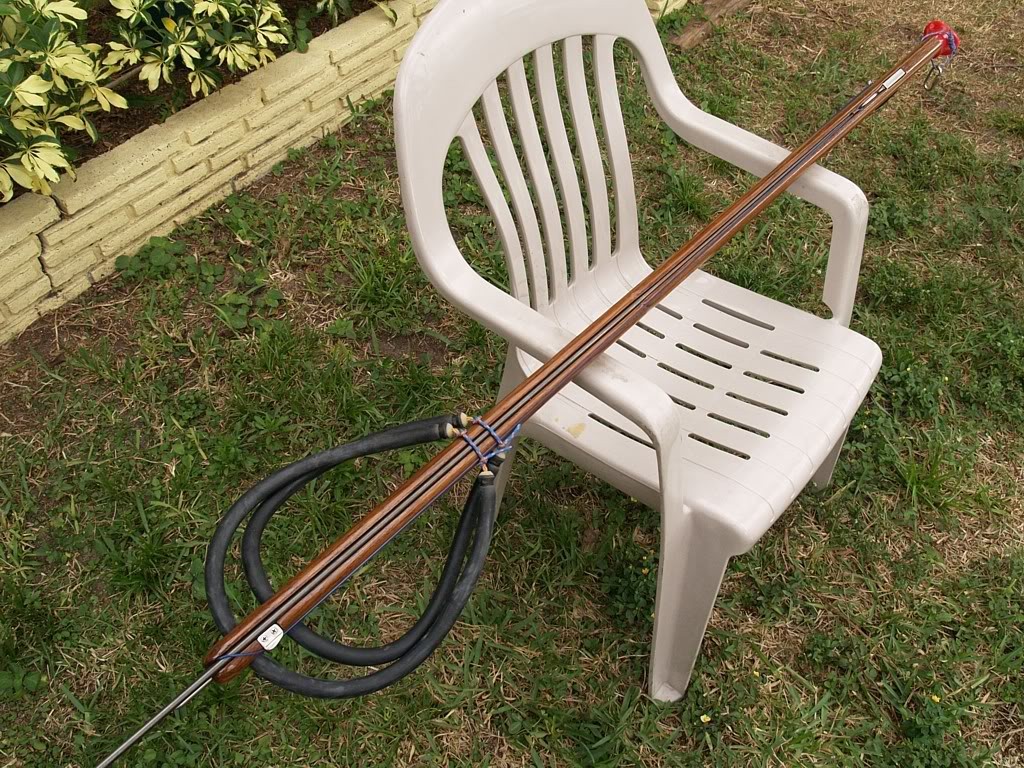
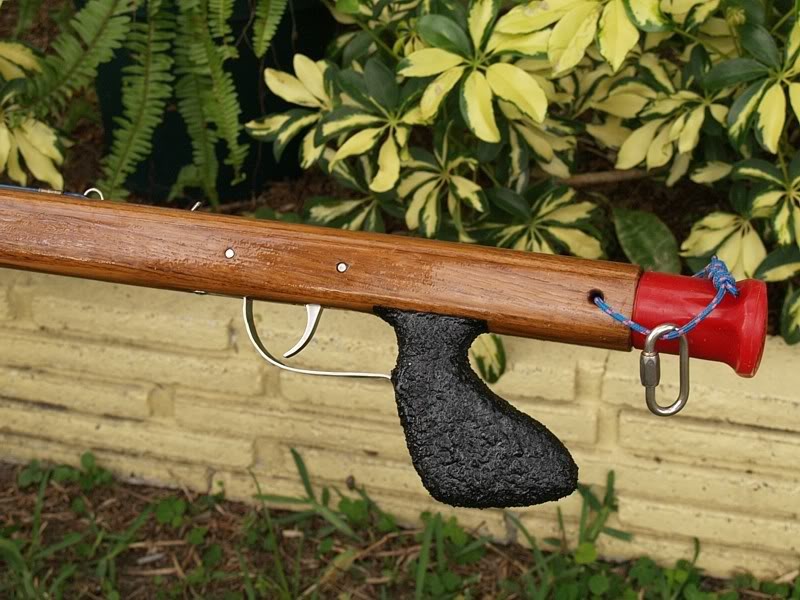
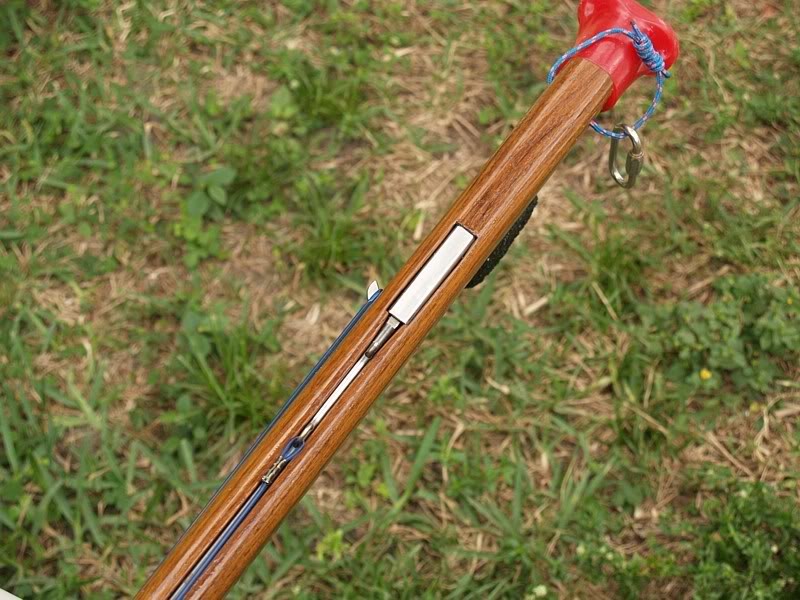
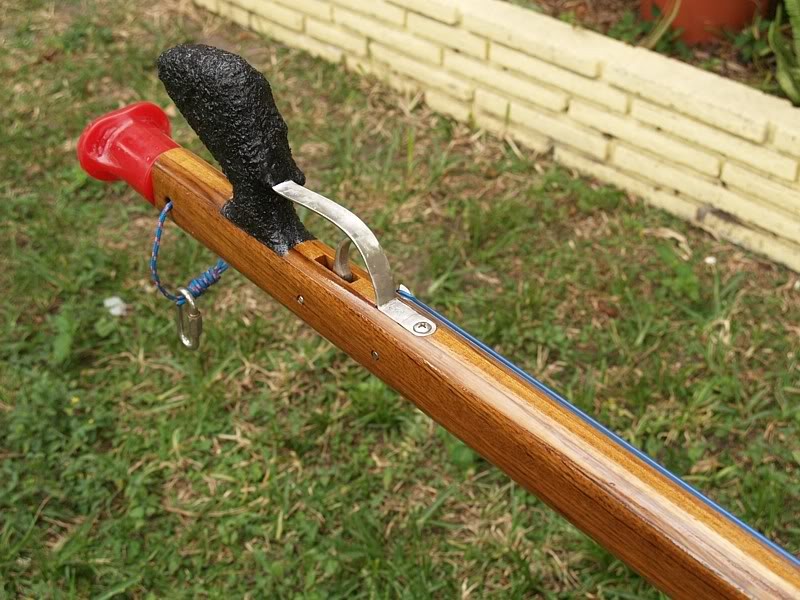
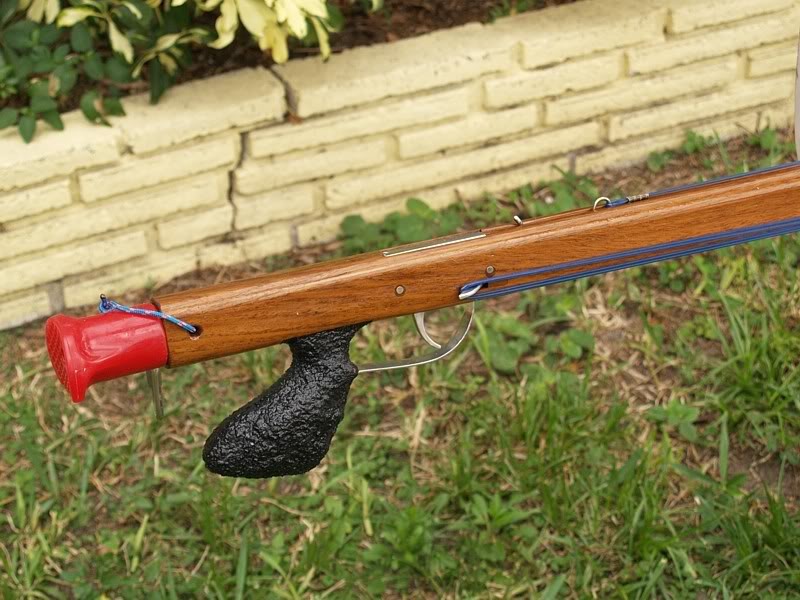
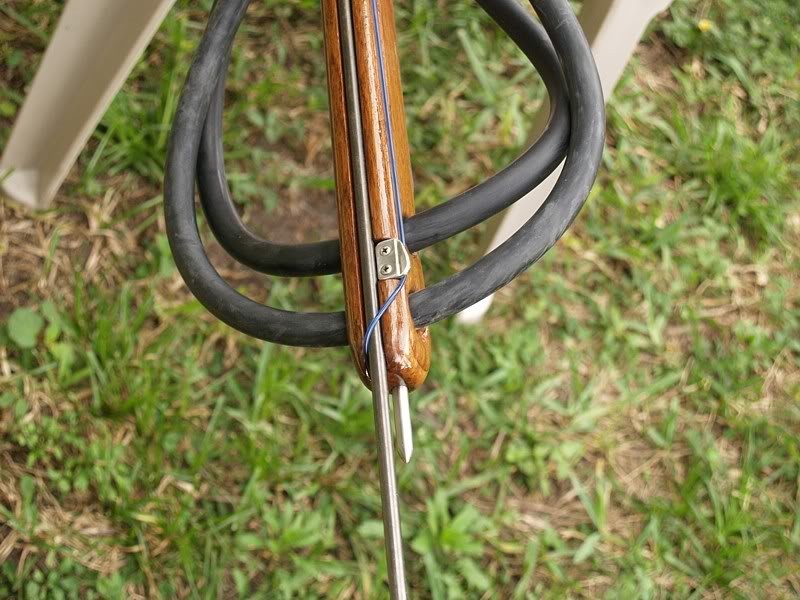
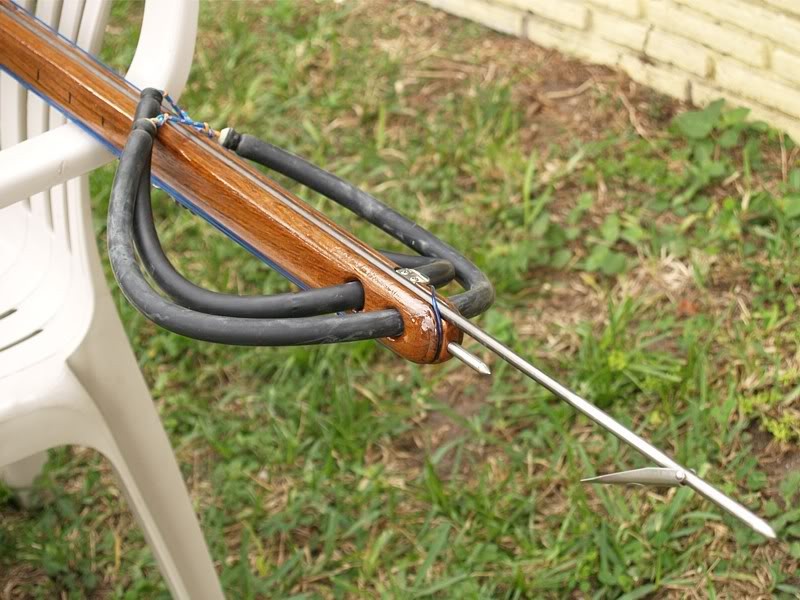
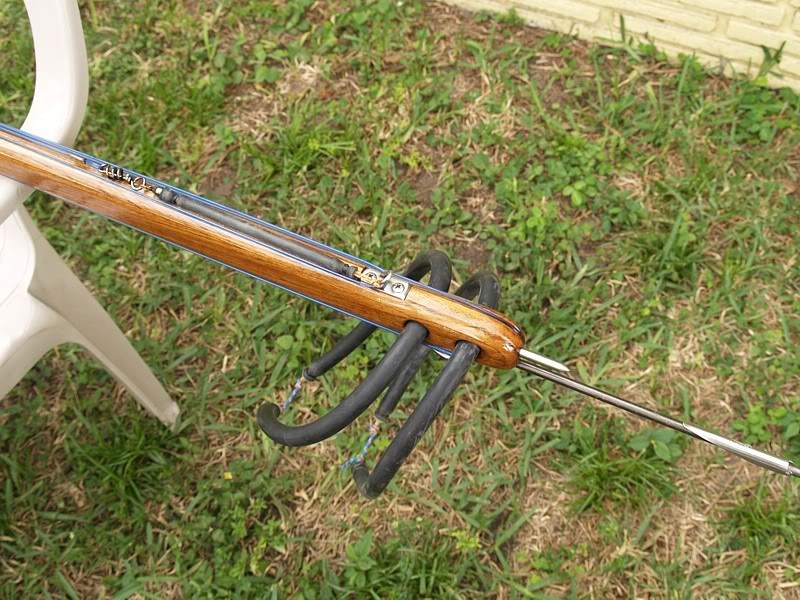
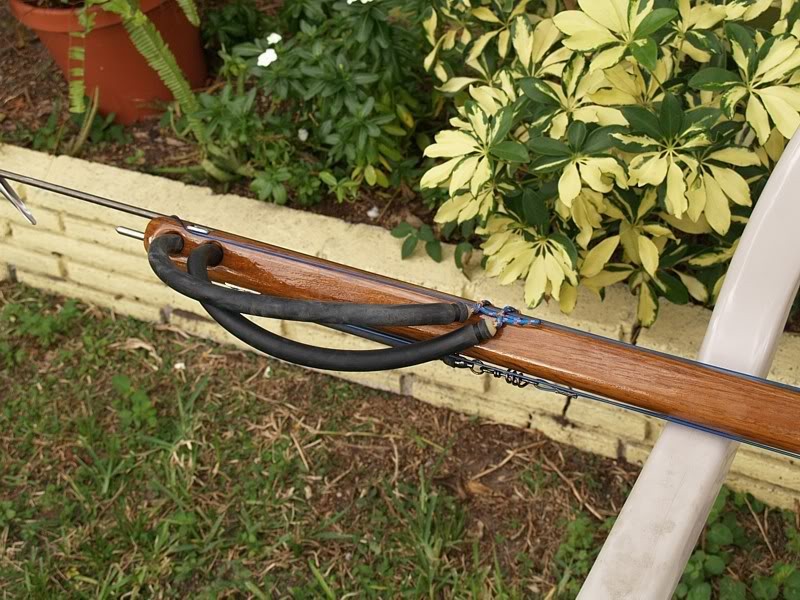
    Here are pics of the gun. Thanks to Sergio for bringing it. Click on the pics to see them in full resolution.





    Thanks hau. I'm worried that it may be a little too heavy for general use here but I do think it's well made. Something about the finish; I don't really like the glossy look, I prefer a matte finish. Penetrating epoxy is very easy to apply, one coat is done in two minutes and there's no concern of runs forming. It dries fast too. I like to do two coats and the finish comes out between matte and gloss. This time however after two coats there was one little spot that I need to retouch so I said might as well and did a third coat.

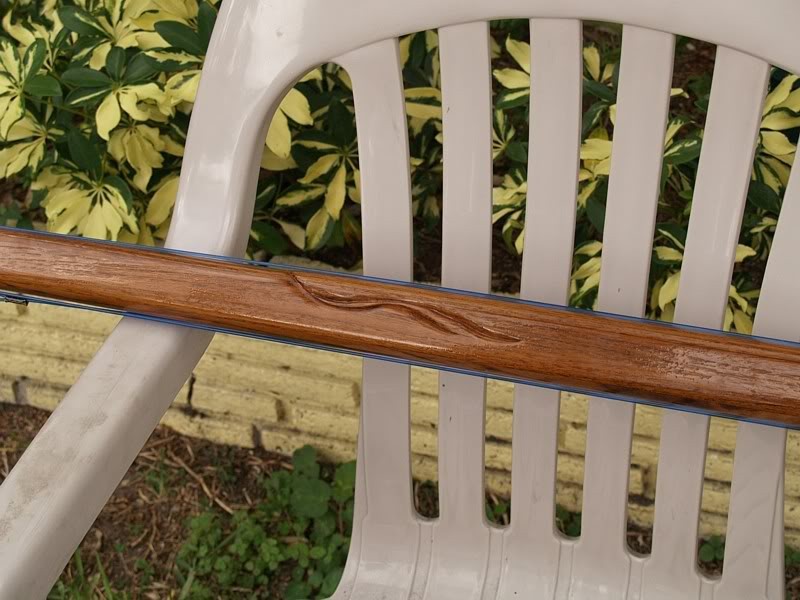
    I like the carving, reminds me of pinstripes on a car.


    Steve

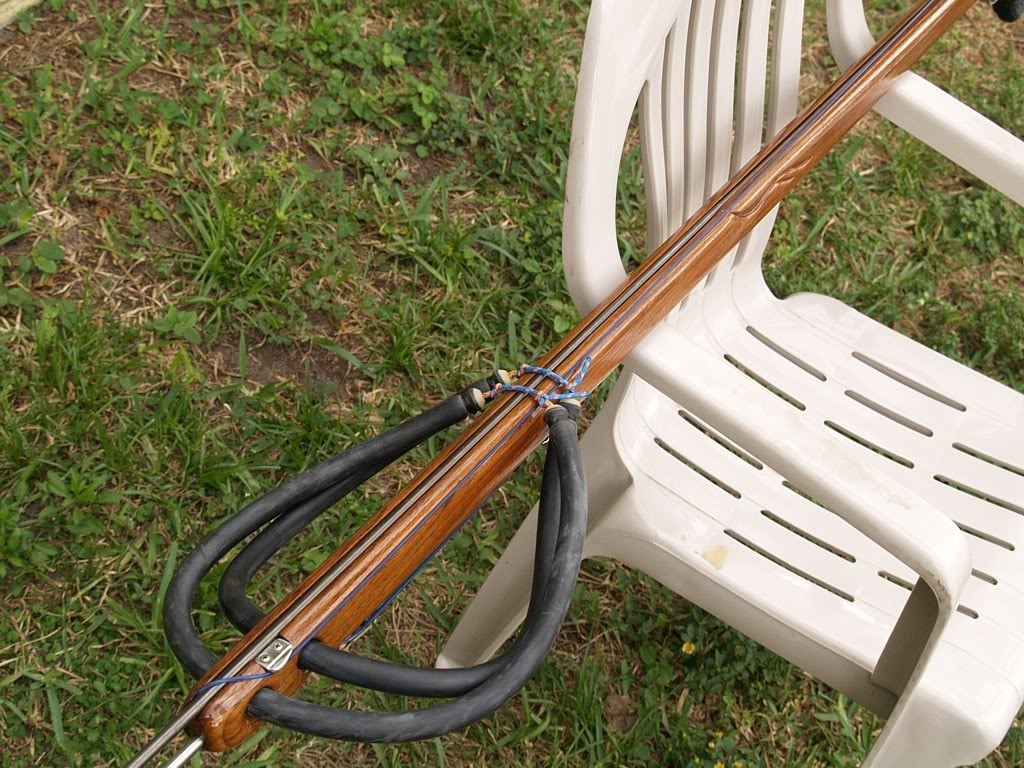
    Thanks, I'm not usually the one to get fancy on a gun. I believe the gun is a tool and I also believe it's just a matter of time before it gets lost. As such I like a simple stick. With this gun however I did a couple of cosmetic touches the carving being one of them. The reason for the carving is to break up a little the profile of the gun. This gun was originally intended to have a full enclosed track. After cutting the track I was rounding the edges and on one of the passes for the top of the gun the guide bearing dipped into the track and before I knew it I cut about 6" off the top exposing the track. At this point there were two options, plane down the top of the gun and make it an open track gun, or make half the gun open track. I decided to go with the latter. I never thought or heard about doing this before but it turns out that on the other board some people consider this the "ultimate" gun LOL.


    Anyways after having done so the step down on the top of the gun looked rather weak. So I put the carving there to define the point where it goes from enclosed to open. And yes like a pin stripe on a car it provides detail and takes the eye away from the big profile which wasn't very appealing.


    The other cosmetic touches that I thought were excessive are the recessed trigger guard and the little line on the shooting line guide plate. I like the plate as opposed to the pin because the gun being tossed around on the boat the pin tends to catch on things and can splinter the wood.

    Ahh Julio, your words are gospel to my ears! Are we here to talk about guns or just pat each other on the back? <img src= " height="23" srcset="https://spearfishing.world/forum/images/smilies/emojione/1f606@2x.png 2x">


    There are a few things about that shaft worth noting. It's a Ray Odor shaft that is a back up shaft for my other gun. Ray made it to my specs with the main difference being that the first pin is closer to the back of the shaft than what you would normally see on production shafts. I tried to figure out why the distance from the back of the shaft, it's lost band stretch right? So I had him put the pin closer and I don't see any disadvantage, I've been using it that way for a while. If I could have it my way again I'd make it so that the first pin has just enough distance to clear the mech.


    My other gun.


    Being that this shaft is for my other gun and my other gun is shorter the shaft overhang is too small. Hence I will not even use this new gun until March approximately which is when I get my shipment of shark fin tabbed shafts. I believe strongly in having 13" of overhang and don't even want to shoot the gun until I have the right shaft for fear of messing up my aim. The new shafts do have two tabs each.


    With my primary gun I use a 7mm shaft. For the 7mm shaft I believe that two 16mm bands is all the power I need. When using two 16mm bands, which I have been for 3 years now, I always put the bands on one tab. I like simplicity and when loading fast I don't have to worry about where to put the band. I took this one step further and ground off the 2nd pin off of Ray's shaft. I like how when I go to load I don't even have to look down at the pin. I can load by feel because there's no other place for the bands to go. This is a set up that I'd like to maintain whenever using two bands.


    With this new gun however I feel it has enough mass to maybe take an 8mm shaft with three 16mm bands or two 16mm bands and one 14mm band. As such the 8mm shaft will keep the two tabs while I will definitely grind off one tab from the 7mm shaft and have to drill a hole in the other tab for the shooting line. I couldn't mix up my order of shafts to have them made that way from the beginning. I do regret a little not having asked for the tabs to be welded closer to the back. But I remember discussing this with someone and there was a reason why on some guns this would be a problem I just can't remember exactly what it was.


    Anyways I let my bands get a little soft, I don't mind it I like the smooth release. I found that in most situations where I need to power down loading just the one closer band is enough to not bend the shaft or mess up the point on rocks, even with hole shots.

    The gap is 1", no particular reason, it just looked like enough wood to support the band. I probably could've gone with less, I have a tendency to make things stronger than they need to be. The amount of wood in front of the first hole is just enough to hold the shark spike securely. Otherwise I'd put the first band hole closer to the front.

    Specs:
    Stock - %100 teak 5 vertical laminates and one horizontal laminate on top.
    Stock length - 152cm.
    Stock width - 3.3cm
    Stock height at enclosed track - 4.4cm
    Stock height at open track - 4.1cm
    Finish - 3 coats of penetrating epoxy.
    Band stretch - From furthest band hole to tab 117cm.
    Bands - 2 x 16mm.
    Shaft - 165cm, 7mm one pin and a dog house.
    Trigger mech - Neptonics Reef with automatic resetting line release.
    Handle - One piece Ipe fastened to the stock using a mortise tenon joint and epoxy. Covered with Herculiner for grip.
    Total weight with shaft and bands - 5lb 6oz


    The beautiful stock was made by Tin man's father, the craftsmanship is flawless. Thanks Jeff for the help along the way. You can see I used your piece of stainless steel for the line guide and even made it pretty by cutting a line into it. I also used the headless hex bolt for the line release.


    Thanks Davie for cutting the track.


    I'll post some more details about the construction later.

    Can one pin done that way (without a notch) hold two 5/8 bands safely?


    Do you always put a notch in addition to the pin or was this a special case? What is the reasoning behind the notch?

    Julio, I don't understand why the hole for the pin needs to be drilled from the bottom up. I've thought before about what I'd do as far as far as pins if I had to make my own shafts because I like a deep track and notches wouldn't do. I imagined drilling from the top on an angle but not right through the shaft so the pin would bottom out in the hole. I've thought of making the hole of a size that would make a very tight fit for the pin, then heating the hole and pushing the pin in because the hole would expand slightly from the heat. Then when it would cool down it would grip the pin very strong. I didn't understand the bit about the v-shaped base. What are the advantages of doing it the way you did?


    I like how the shooting line hole is nearer the top of the shaft allowing for a deeper track.

    That pic answers what would've been my next question, if you put the band holes on top again. I take it then that it works well and future guns will have the same design? I'd like to see how the band looks on the bottom of the muzzle. Are the bands easy to insert?


    Why did you choose to go with two pins as opposed to one pin and a slot for routing the shooting line?


    What's the band stretch from band slot to furthest pin?


    I can't tell if that's a pin, a notch or a tab on the shaft? Who made the shaft?


    That looks like a 5/8 band, is it enough power with just one band or will the gun also take a 3/4 band?


    BTW I highly recommend the pigs tail snap and swivel combination for the bungee, I found it to be stronger. I have a good source for those here in Florida if you need it.

    Thanks for the heads up. I agree that the Evo suits are cheaply made. One of the ways to tell is the finishing at the wrists and ankles. The stitching is the bare minimum to keep the material together. I've had good experiences with their other stuff though. The Evo rashguard I have has lasted a summer's worth of diving with no damages. A mesh dive bag that they sell is very durable and has been my favorite for a couple of years. I wouldn't buy their wetsuits though unless there was no other option.

    Wow Julio that's quite an evolution. Beautiful lines on the new gun. Very innovative I've never seen anything like it. Firstly could you please put up some more pics. BTW if you upload them to something like imageshack you can leave the pics at bigger resolution, the forum will resize them to fit but they can still be viewed at original size.


    Is that one of your trademark line releases with the spring sitting in a groove in the wood? I can't figure out how it works from the pic.

    I think you'd hear their excitement if you were to bring la mujer inflable <img src= " height="23" srcset="https://spearfishing.world/forum/images/smilies/emojione/1f606@2x.png 2x">

    What I found a little strange is that the deer ran in a straight line. I thought that they tend to zig zag more. I wonder if the vehicle on each side played a role in that. I realize that the chase couldn't otherwise be filmed, but I hope it wasn't one more factor against the deer in this situation. What I mean is that the deer felt it was being chased by the vehicles as well and it's avenue of escape was blocked in those directions. Who knows what the situation there really was, maybe they let go a captive deer. I'd like to imagine that the saluki can chase down a deer on a straightway with no other factors working against the deer.